Saturday, 20 June 2020

JS Animation for Beginners

Simple Spinner Animation


The Start and Stop Spinner app example given in MDN docs ( Go to example ) has one drawback. When you stop a spinner and restart it , the loader does not start spinning from the point where it was stopped. This is due to the usage of timestamp in the requestAnimationFrame callback or draw(). This  timestamp is  a DOMHighResTimeStamp  ~= performance.now() . In other words, This gives the current time. To be more precise, performane.now() gives the elapsed time since the document was loaded. This callback parameter will be of great use for many animation scenarios but it is not appropriate for this usecase. One will be expecting the spinner to start spinning from where it was paused. Take a look at what happens when you run the code given in MDN docs.


MDN-Spinner

Before you proceed, go through MDN docs to read about requestAnimationFrame here). In a nutshell , this is used to synchronize your paints to your screen's refresh rate. rAF is used to get the optimal 60fps.

The MDN sample code uses timestamp to calculate the rotateCount or the degree of rotation. We don't have control over this timestamp value. We cannot start and pause it. We click on the screen to pause the spinner  (say the timestamp value is 117.43 at this instant), we wait for a while and click on the screen again to resume the spinner . Now , the timestamp value is much greater than what it was when the spinner was paused (say the timestamp value is now 504.56). This difference is what we see getting reflected in the degree of rotation. Here's how i modified the code to fix this issue:

spinner.js:
 
 1
 2
 3
 4
 5
 6
 7
 8
 9
10
11
12
13
14
15
16
17
18
19
20
21
22
23
24
25
26
27
28
29
30
31
32
33
34
35
36
37
38
39
40
const spinner = document.querySelector('div');
let isSpinning = true;
let rotateCount = 0;
let startTime = null;
let rAF;
let rotateCounter;


startRotateCounter = () =>{
    rotateCounter= setInterval(() => {rotateCount+=15}, 60)
}

document.body.addEventListener('click',() => {
    if(!isSpinning) {
        console.log("starting at:", rotateCount);
        startRotateCounter();
        draw();
        isSpinning = true;
    }
    else {
        cancelAnimationFrame(rAF);
        clearInterval(rotateCounter);
        console.log("stopping at:",rotateCount);
        isSpinning = false;
        
    }
});

let draw = () => {
    if (rotateCount > 359) {
        rotateCount %= 360;
   }

      spinner.style.transform =`rotate(${rotateCount}deg)`;
    
      rAF = requestAnimationFrame(draw);
}

startRotateCounter();
draw();

I used rotateCounter to control the degree of rotation of the spinner. rotateCount is incremented by 15 every 60 ms. You can control the speed of rotation by changing this increment value. You can play around with these two values and choose the values which suit your need.

Notice the smooth transition between pause and restart:


spinner


Get the source code here:


References:


Friday, 19 June 2020

CSS Flex Layout and Alignment

Justify Content Vs Align Items

Before we get started , Let's first understand what is a flex-direction  because justify-content and align-items are dependent on its value.

It can have two values: row & column

flex-direction: row

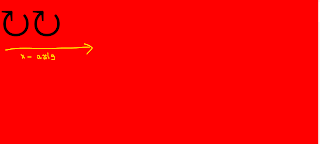
If the flex-direction of the container is row, it's children will be placed one after the other horizontally. Meaning, the primary axis is x-axis. Let's visualize this. I have two loop icon divs inside a body container. The container has the flex-direction set to row. Here's how it will appear:


What if i give the property justify-content:center to the container?


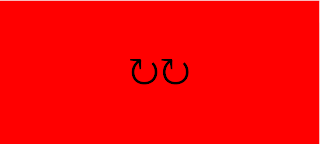
You guessed it right. The icons are now moved to the center of the x-axis.

Let me remove justify-content property and add another CSS property to the container :- align-items:center and see what happens:


The icons are now placed in the center of the y-axis.

What if i add both the properties (justify-content:center , align-items:center) to the container?


The icons are placed in the center of both x-axis and y-axis.


flex-direction: column

If the flex-direction of the container is column, it's children will be placed one after the other vertically. Meaning, the primary axis is now y-axis.


Now justify-content:center will place the icons in the center of y-axis as it is the primary axis. and align-items:center will place them in the center of x-axis


justify-content:center
 

align-items:center


(justify-content:center , align-items:center)


CHEATSHEET:


 flex-direction     primary axis     justify-content     align-items    
 row x-axis x-axis     y-axis    
 column y-axis y-axis x-axis


POINT TO REMEMBER:

justify-content acts on primary axis.


A simple JS App - setInterval()

STOP WATCH


stopwatch


The app is built using HTML , CSS & JS.  
The problem statement for this app can be found here :  MDN Web Docs - Asynchronous JS 

The app is designed using CSS flex box.


stopWatch.html:

 1
 2
 3
 4
 5
 6
 7
 8
 9
10
11
12
13
14
15
16
17
18
19
20
21
<html>
    <head>
    <script src="stopWatch.js" defer></script>

    <link rel="stylesheet" type="text/css" href="stopWatch.css">
</head>
<body class="main-layout">
    <div class="container">
    <div class="display">
        <div class="hour">00 </div><span class="colon">:</span>
        <div class="minute">00 </div><span class="colon">:</span>
        <div class="second">00 </div>
    </div>
    <div class="button-group">
    <button class="start-button">Start</button>
    <button class="stop-button">Stop</button>
    <button class="reset-button">Reset</button>
     </div>
    </div>
</body>
</html>


stopWatch.css:

 1
 2
 3
 4
 5
 6
 7
 8
 9
10
11
12
13
14
15
16
17
18
19
20
21
22
23
24
25
26
27
28
29
30
31
32
33
34
35
36
37
38
39
40
41
42
43
44
45
46
47
48
49
50
51
52
53
54
55
56
57
58
59
60
61
62
63
64
65
66
67
68
69
70
71
72
73
74
75
76
77
.main-layout {
    display: flex;
    align-items: center;
    background-color: bisque;
}
.container {
    display: flex;
    flex-direction: column;
    align-items: center;
    justify-content: center;
    width:500px;
    height:250px;
    margin: auto;
    background-color: black;
    border-radius: 10px;
    box-shadow: 4px 5px 6px 4px grey;
}

.display {
    display: flex;
    align-items: center;
}

.display div{
    margin-left: 0.5em;
    margin-right: 0.5em;
    border: 1px;
    border-radius: 8px;
    border-color: blue;
    box-shadow: 4px 5px 6px 1px rgb(20, 96, 143), 3px 5px 8px 0.5px rgb(245, 58, 58);
    border-style: solid;
    width: fit-content;
    padding: 1em;
    font-family: 'Franklin Gothic Medium', 'Arial Narrow', Arial, sans-serif;
    color: whitesmoke;
}

[class$='button'] {
    margin-left: 0.5em;
    margin-right: 0.5em;
}

.button-group {
    display:flex;
    align-items: center;
    margin-top: 2em;
}

.button-group * {
    display: flex;
    border-radius: 10px;
    padding-top: 2px;
}

.stop-button {
    background-color: rgb(211, 35, 35);
    box-shadow: 1px 1px 7px 1px rgb(235, 83, 83);
}

.reset-button {
    background-color: rgb(230, 179, 13);
    box-shadow: 1px 1px 7px 1px rgb(231, 195, 78);
}

.start-button {
    background-color: yellowgreen;
    box-shadow: 1px 1px 7px 1px yellow; /**/
}

[class$='button']:focus  {
    outline: none;
}

.colon {
    padding: 0.5em;
    color : whitesmoke;
}


stopWatch.js:

 1
 2
 3
 4
 5
 6
 7
 8
 9
10
11
12
13
14
15
16
17
18
19
20
21
22
23
24
25
26
27
28
29
30
31
32
33
34
35
36
37
38
39
40
41
42
43
44
45
46
47
48
49
50
51
52
53
54
55
56
57
58
59
60
61
62
63
64
65
66
67
68
69
70
71
72
73
74
75
76
let counter = 0;
let hourDisplay = document.querySelector(".hour");
let minDisplay = document.querySelector(".minute");
let secDisplay = document.querySelector(".second");
let clock;
const TIME_PART_SECOND = 'SECOND';
const TIME_PART_MINUTE = 'MINUTE';
const ALERT_TIME_COLOR = "red";
const DEFAULT_TIME_COLOR = "white";

let startButton = document.querySelector(".start-button");
startButton.addEventListener('click',() =>{
    console.log("starting timer");
    clock=setInterval(startTimer, 1000);

});


// callback method used in setInterval method
let startTimer = () =>{
    counter++;
   let hoursElapsed = Math.floor(counter / 3600);
   let minsElapsed = (Math.floor(counter/60) % 60);
   let secondsElapsed =Math.floor(counter) % 60;
   
   // change the color of the display font for minutes and seconds if either of them 
   // is 10 seconds or minutes from 60
   checkTimeLeftInTimePart(secondsElapsed, TIME_PART_SECOND);
   checkTimeLeftInTimePart(minsElapsed,TIME_PART_MINUTE);

   //Format the time parts to 01:01:01 if they are less than 10
    secDisplay.textContent=secondsElapsed < 10 ? `0${secondsElapsed}` : secondsElapsed;
    minDisplay.textContent= minsElapsed < 10 ? `0${minsElapsed}` : minsElapsed;
    hourDisplay.textContent = hoursElapsed < 10 ? `0${hoursElapsed}` :hoursElapsed;
}

// stop the timer by clearing the interval
let stopButton = document.querySelector(".stop-button");
stopButton.addEventListener('click', ()=>{
    console.log("Stopping timer");
    clearInterval(clock);
});

// reset the counter to 0 and update the display
let resetButton = document.querySelector(".reset-button");
resetButton.addEventListener('click', ()=> {
    counter=0;
    secDisplay.textContent='00';
    minDisplay.textContent='00';
    hourDisplay.textContent='00';
});

// Function: check if the time part (seconds and minutes) lies between 50 and 60
// change the color to red if the above condition is true
// else change it to the default color
let checkTimeLeftInTimePart = (time, timePart) =>{
    if(time >= 50 && time < 60) {
        changeTimePartFontColor(ALERT_TIME_COLOR, timePart);
    } else {
        changeTimePartFontColor(DEFAULT_TIME_COLOR, timePart);
    }
}

//Function: change the color of the display text for minutes and seconds
let changeTimePartFontColor = (color,timePart) => {
    switch(timePart) {
        case TIME_PART_SECOND:
            secDisplay.style.color = color;
            break;
        case TIME_PART_MINUTE:
            minDisplay.style.color = color;
            break;
        default:
            // do nothing
    }
} 


Bonus:

How to set favicon (tab icon):

  1. Convert your image to .ico file here: convertico
  2. Copy the file to your project folder.
  3.  Add the below line inside the <head> tag in stopWatch.html.
<link rel="shortcut icon" type="image/x-icon" href="favicon.ico">


Referesh your html page and see the favicon in your boswer tab.


Github link : Stop Watch Repo


Friday, 12 June 2020

Typescript - Index signature

Did you know?


  1.  JavaScript can have object indices. if an object is passed as an index, toString() method will be called implicitly.  However, TypeScript supports only number and string indices. If you are using an object index, an explicit call to toString() should be made.
JavaScript Demonstration:

An object with an overriden toString() method which returns a string: 

 1
 2
 3
 4
 5
 6
 7
 8
 9
10
11
12
obj = {
  toString(){
    console.log('toString() called')
    return 'Hello'
  }
}


foo= {} // calls Object constructor
foo[obj] = 'world' // prints: 'toString() called'
console.log(foo[obj]) // prints: 'toString() called', followed by "world"
Console.log(foo['Hello']) // Note what is being passed as index. prints "world"
    
 
Now what will happen if the toString() method  has no return statement? Will it throw an error?

 
 1
 2
 3
 4
 5
 6
 7
 8
 9
10
11
obj = {
  toString(){
    console.log('toString() called')
  }
}


foo= {} // calls Object constructor
foo[obj] = 'world' // prints: 'toString() called'
console.log(foo[obj]) // prints: 'toString() called', followed by "world"
Console.log(foo['undefined']) // Note what is being passed as index. prints "world"


You can still use the string "undefined" as index to retrieve the value 'world' which you set to the index obj!

Suppose you have two object indices where you want to save two different values. These Objects have overriden toString() methods with no return value. Though the code might look like we are storing the values in two different objects, we are in fact storing them at the same key "undefined".

 1
 2
 3
 4
 5
 6
 7
 8
 9
10
11
12
13
14
obj1 = { 
         toString() {
           console.log("xyz")}
      }

obj2 = {
         toString() {
           console.log("xyz")}
      }

foo={}
foo[obj1]="hello" // prints: xyz
foo[obj2]="world" // prints: xyz
console.log(foo["undefined"]) // prints: world

What will happen if the toString() is not overriden?


1
2
3
4
5
6
obj = {} // has default toString() of Object


foo= {} // calls Object constructor
foo[obj] = 'world' // prints: nothing
Console.log(foo['[object Object]']) // Note what is being passed as index. prints "world"


As per MSDN WEB DOCS :
If this method is not overridden in a custom object, toString() returns "[object type]", where type is the object type.
In the above code snippet , you will observe that the index used to retrieve the value is "[object Object]" 


TypeScript Demonstration:

1
2
3
4
5
6
7
let obj = {msg: "Hello"}

let foo: any = {};
foo[obj] = 'World'; // Error: Type '{ msg: string; }' cannot be used as an index type.

foo[obj.toString()] = 'World'; // explicitly call toStrict method of Object
console.log(foo["[object Object]"]); // toString called, World


As you can see , TypeScript will not permit you to use an object index. 


"Why do you even want to store a value at a location 
'[object Object]' ?? 😝"


References:


JS Animation for Beginners

Simple Spinner Animation The Start and Stop Spinner app example given in MDN docs (  Go to example  ) has one drawback. When you s...